Always a sucker for DIY projects, I’ve come a long way from starting seeds in egg cartons on the windowsill. There’s nothing wrong with doing it that way, and I’ve had moderate success with it over the years. I’ve also had miserable, heartbreaking failures from trying to do everything on the cheap, and learned in the end that when it comes to seed-starting, we should work smarter not harder.
So, for those of you who are still rolling newspaper pots, saving your egg cartons and toilet paper rolls, relying on the weak winter sun (and lucky enough to have a south-facing window) to grow spindly, leggy seedlings that flop as soon as you plant them out: listen up! This is my entire seed-starting setup with which I’ve enjoyed great success in growing all types of plants from seed, all for less than $200. Which I know is still a fair investment for many of us growing on a budget, but it’s one you’ll have for years, and no need to invest a small fortune into fancy grow lights or shelving units.
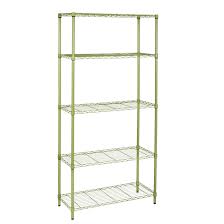
This is a pretty general-use, stainless steel adjustable storage shelving unit. It’s not anything out of the ordinary, but it was just right for what I was looking for. The selling points for me were:
- Each shelf was long enough and wide enough to fit standard-sized seed-starting flats, which tend to run approximately 11″x21″.
- The height between shelves was about as much space as you’d want between seedlings and grow lights, and the shelves are height-adjustable.
- The metal mesh construction allows for air flow, and won’t be warped or otherwise damaged by excess moisture or spilled water.
- The open bars of each shelf gave me multiple options for how I could hang my grow lights, which at the time of purchase I still wasn’t sure how I was going to do that.
- Easy DIY assembly and no extra tools required to put it together!
- The olive green coating softens the look of steel so it blends into the surroundings wherever you put it, and just happened to match the colors in my little grow room. Hey, we’re gardeners, aesthetics matter.
I got mine on sale from Home Depot, but you can also find it at other home improvement stores or order it online direct from the manufacturer. It’s lightweight, has simple instructions for assembly, and I was able to put it together myself without needing an extra pair of hands. If you don’t want to spend the money, look around your home and see if there’s a shelving unit or bookcase you can re-purpose.

I really went down the rabbit hole in my attempts to research the best kind of grow lights. I’m still not sure I fully understand all the variables, but what I gathered is that, unless you’re a professional grower, worrying about things like PAR and PPFD probably doesn’t matter that much. I was and still am convinced it’s not necessary to spend hundreds of dollars on grow lights, so I found this set on Amazon for about $40.
These had good reviews, unlike some other similar-looking products, were the right size for the space I had, and came in a 4-pack that could be connected or used individually. They also offered multiple ways to hang, which eased my anxiety about not being sure how I was going to put all this stuff together. I’ve ended up using the zip-ties provided, which suits my commitment-phobia of permanent installation, and also allows me to slide them from side to side on the bars they’re hanging from, so I can have them centered more over one tray or another.
Overall they’ve worked out well and I’m not seeking to replace them with anything fancier or more expensive. I do adjust their height periodically so smaller seedlings and those that need brighter light are closer. It probably wouldn’t hurt for me to order one more set to fully cover the entire shelving space, since I have a tendency to cram 2-3 flats onto each shelf, and then I end up rotating plants every few days to make sure they all get a chance to be directly under the lights. But in the interest of saving money, and giving myself an activity to do instead of overwatering all my seedlings while I wait for them to grow, I’ve made do with one 4-pack of lights just fine.
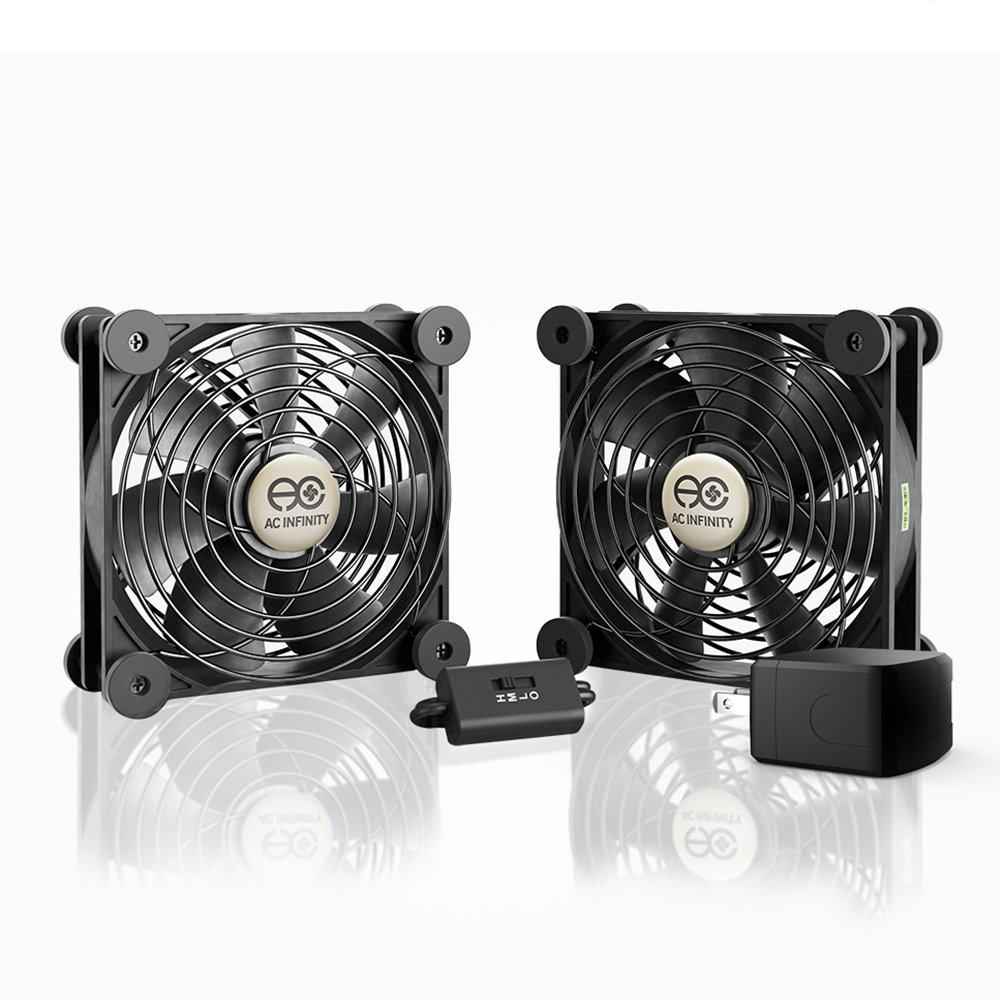
All I’m going to say about this is: if air flow doesn’t come into consideration with your seed-starting setup, you’re going to regret it. I have lost so many starts to damping off, after years of wondering what I was doing wrong, I finally got the message. Healthy seedlings need air flow! For one, it prevents damping off, which is a fatal condition that thrives when soil stays too wet, and ultimately kills seedlings, making them look like they were pinched out at the base of their stems. Another benefit of air flow is that it mimics a gentle breeze, which seedlings would naturally experience if they were growing outside, and triggers them to grow stronger roots and thicker stems so they don’t flop over.
I don’t think you need to get any special type of “plant fan”. Just get something to create a light breeze, some gentle air movement over your seedlings. You could use a regular floor or desktop fan if you have one, or get something like these, ultra-quiet cooling fans designed to keep electronic devices from overheating. I got this pair on Amazon for $25, as recommended by a neighbor / fellow indoor gardener who also uses them.
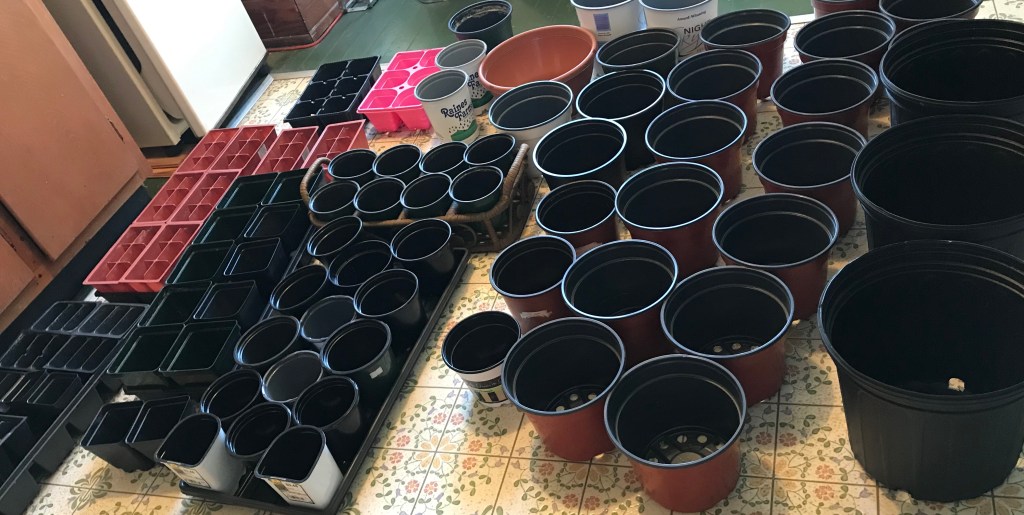
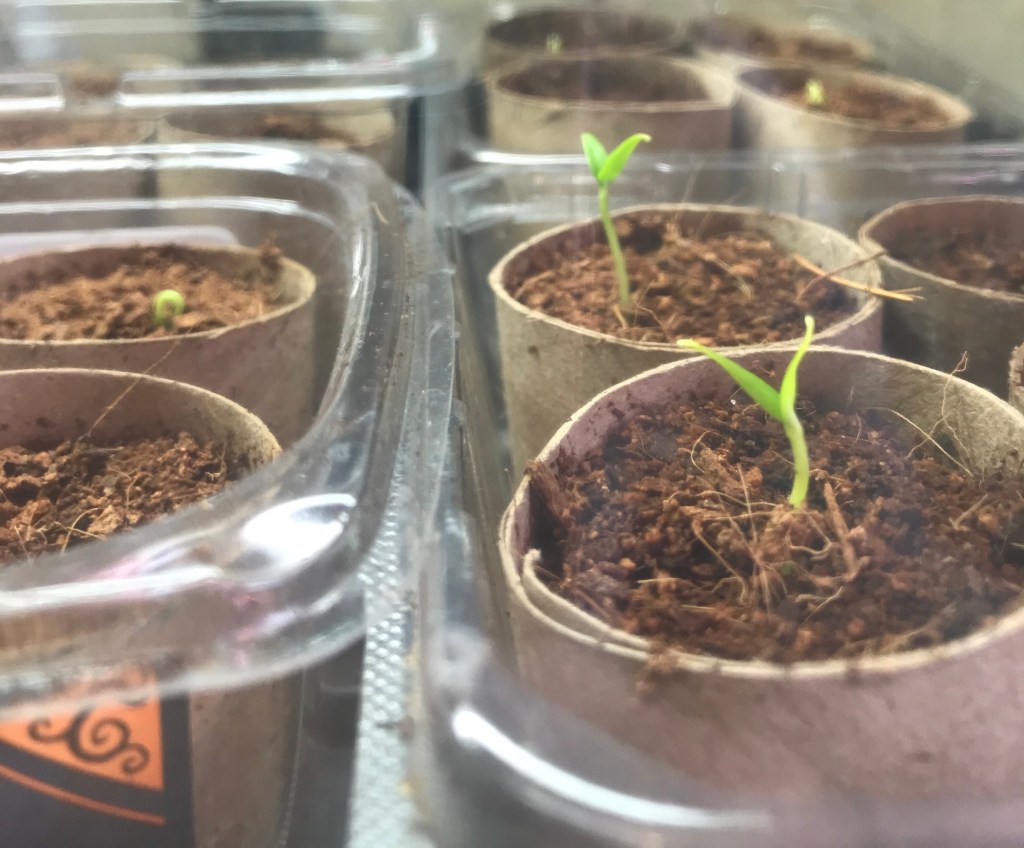
If there’s one area you can really save money in, it’s getting a little creative with the actual containers you use for seed starting. I save all the plastic pots and trays whenever I buy plants from a nursery. I also save little plastic yogurt cups, cardboard and plastic milk/juice cartons, and the plastic trays and clamshells that grocery stores pack mushrooms and berries in. Basically, anything that is about the right size, clean plastic or cardboard that you can poke some drainage holes in, can easily be turned into a small plant container. It’s kind to the earth and to your wallet.
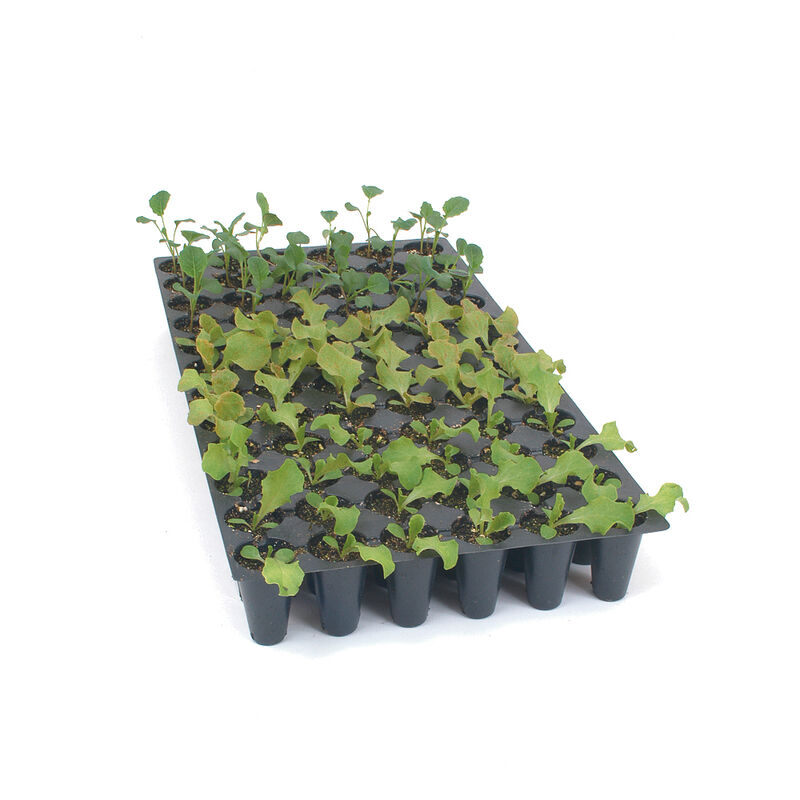
That being said, I prefer to start most seeds in these small cell flats, and then pot them up into larger containers as they get bigger. The smaller cells mean that I can fit more seeds into the space that I have, use less soil or starting mix, and water more efficiently. If you let the seedlings grow in these trays for a sufficient amount of time, the roots will become established enough that you can easily lift the whole plug out and pot it up into a larger container or even just pop it in the ground.
You can get these trays in a variety of cell numbers, there are recommended sizes depending on what you’re growing, and also think about how many of each variety you plan to grow. Pair the flats with leak-proof trays for bottom watering, and add a humidity dome on top to keep soil moist while seeds are germinating.
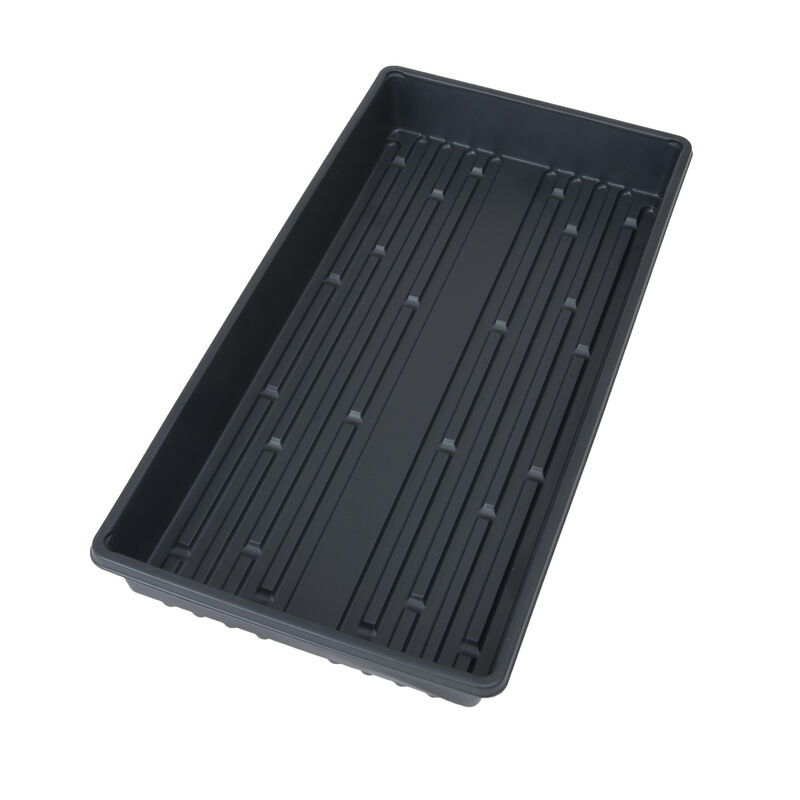
If you’re not already bottom watering your plants, I really suggest that you switch to this method if possible. Rather than watering your plants from overhead, splashing soil all over the place and getting the leaves wet which makes them vulnerable to disease, place your containers in a leakproof tray and let them soak up as much water as they need from the bottom. This method has a lot of benefits to keep your plants happy and healthy.
- Avoids the dreaded damping off of vulnerable young seedlings, discussed earlier.
- Prevents fungus gnats and other annoying pests that like to frolic and reproduce in the surface of wet soil.
- Keeps tiny and surface-sown seeds in place, which can get dislodged and lost if you’re pouring water on top of them or misting with a really strong sprayer.
- Encourages fuller, deeper root growth by stimulating roots to grow down toward the source of water at the base of the tray.
- If you accidentally overwater, you can just dump the excess water out of the tray, easy peasy.
- If you even dare to go on vacation while your little green babies are still growing, it’s probably the most fool-proof way to entrust your disinterested partner or clueless neighbor to watch over the watering of your plants with minimal seedling death. “Minimal” being the key word there. If you’re a really serious gardener, you know that from the moment you sow the seeds you can never leave.

I’ve actually never purchased any humidity domes on their own, I have a couple that came with seed starting kits I bought years ago, and I’ve been careful with them so that they’ve lasted long enough to keep reusing every year. If you’re not buying a kit that includes the seed starting tray and humidity dome, just make sure you get things that are of compatible sizes so the dome fits snuggly over the tray without any gaps. You can also find humidity domes that have an indentation to hold a grow light in the top, which could be useful if you don’t have a separate rack or shelf to hang your grow lights. For the budget-conscious, the clear plastic domes from things like Costco’s infamous rotisserie chicken make excellent humidity domes, although you’ll want to pair them with a smaller growing tray for proper fit.
Once your seeds have sprouted, take the humidity dome off to allow for better air flow around the plants. Unless you’re propagating cuttings that need high humidity, the excess moisture that the domes retain can make your young seedlings susceptible to disease and may turn out generally weaker plants.
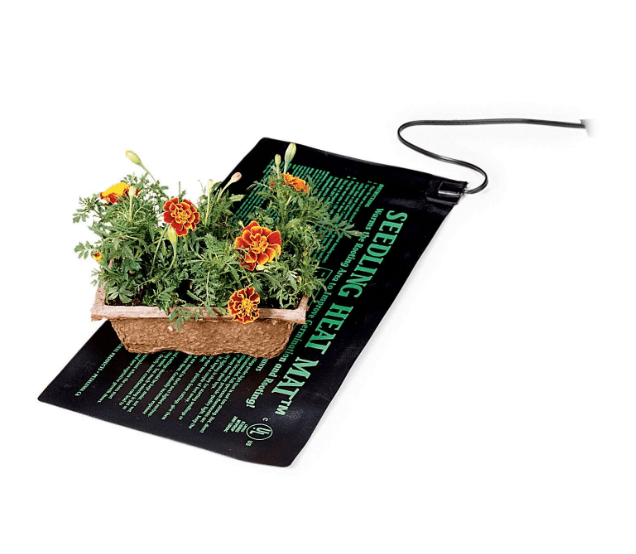
Even though I have one, I’m still agnostic about heat mats. Some people wouldn’t dream of starting seeds without them. I really don’t think they’re necessary for the average home grower, unless you’re trying to start things much earlier than normal, in a cold greenhouse, or you have a particular variety that needs higher temperatures to germinate than the general ambient temperature in most homes. (I’m looking at you, Rhodochiton atrosanguineum.)
You could also find an extra warm spot in your home, the top of a radiator, fridge, or sunny windowsill that might do the trick. While heat does help most seeds to germinate more quickly, and in some cases more reliably, I’ve done well enough for years without a heat mat, making it something I would consider more of a luxury indulgence for serious seed starters. But that being said, it definitely doesn’t hurt to have one.
And that’s it! Oh, well you’ll need seeds of course, but that goes without saying.

If you noticed that I didn’t include seed starting mix in this list…believe it or not, I don’t rely on any special seed starting blend and I’m not loyal to any one particular brand. You want something that’s lightweight, absorbs water easily, but still allows for good drainage and doesn’t stay too soggy. Small particle size is important to give roots lots of space to establish themselves, avoid potting soil with big chunky pieces of bark. I usually make my own blend of coco coir, perlite, worm castings, and very fine potting soil. And while it’s still popular among gardeners, I strongly recommend weaning yourself away from peat moss. That’s a story for another day, but if you’re not aware of any reasons why you might not want to use peat moss, I suggest doing a little research on the subject, Google is your friend.
However you do it, happy seed starting! Have fun with it and remember, if all else fails, you get to support your local nursery!


Leave a comment